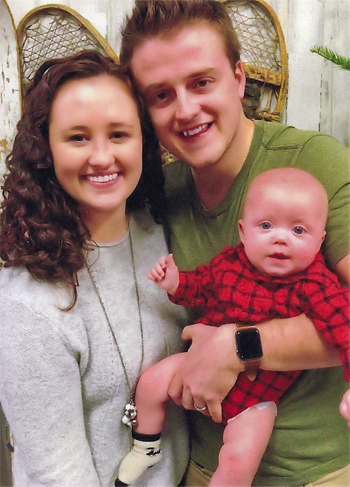
 This is my daughter-in-law Marcy … along with my son Draylen, and my grandbaby Ole.
One thing that we discovered about Marcy early on, is that she is not a fan of most traditional Thanksgiving foods.
A couple of years ago, I found out the kids were going to be coming up for Thanksgiving and since I knew this little tidbit of information about our darling Marcy, I wanted to make sure that she had something that she would like to dive into at dinner as well.
So …. I did what any good mother-in-law would do and I called my son to find out what her favorite food was. (That’s not cheating, right?!) As it turns out, she loves macaroni & cheese.
I had never made a homemade mac & cheese before, but thought I would give it a whirl, and pray that it turned out! lol
I read through a ton of different recipes, and they were all slightly different in their own way, so once I had the gist of what to do, I jumped in.
I decided to start with a base like I would use for my homemade Alfredo sauce (a roux), and then worked my way from there. Believe it or not, it turned out deliciously on the first try! Thankfully, I had written down what I added as I went …. just in case it was good and I would want it to use for future Thanksgiving dinners.
I thought I would share my recipe today. I have lovingly dubbed it Marcy’s Mac & Cheese, as that is how I always think of it when I get the urge to bake up a pan. ♥
I hope you enjoy it as much as we all did!

Marcy’s Mac & Cheese
Ingredients
1 lb. pasta shells, medium size (You can use traditional macaroni/elbow noodles if you like)
½ cup unsalted butter
½ cup all purpose flour
2 ½ cups half and half *See Notes
1 ½ cups whole milk
4 cups Kirkland (Costco) grated Mexican cheese blend
2 cups grated, fresh Pecorino Romano cheese
½ tsp. black pepper
Panko crumbs for topping
Instructions
- Preheat oven to 325° F and butter a 9×13″ baking dish.
- Grate all of your cheeses (6 cups total after grating), and mix together. Split into 2 bowls, with 3 cups of cheese in each bowl. You will use half for your sauce, and half for assembling in your baking dish.
- Combine your milk and half & half in a large measuring cup. (I used my 4-cup Pyrex measuring cup.)
- Bring a large pot of salted water to a boil. Add pasta shells and cook for 2 minutes less than the package directs. Drain, and then run under cool water to wash off starch and keep the noodles from sticking together. Set aside.
- Melt butter in a large saucepan over medium heat, sprinkle in flour, and whisk to combine. This will look like thick paste when it’s ready.
- Next, slowly pour in your milk and half & half mixture – make sure to whisk constantly so there are no lumps. I did this in about 4 different pours, one cup at a time.
- Continue to cook over medium heat, slowly whisking constantly, until nice and thick.
- Add pepper and 1 ½ cups of the cheese, whisking until melted and well combined. Repeat with another 1 ½ cups of cheese.
- Pour your drained pasta into the pot of cheese sauce, stirring until mixed well and all the shells are covered nicely. Pour half of the pasta mixture into your 9×13″ baking dish. Top with 1 ½ cups of cheese, then pour on the remaining pasta mixture.
- Add the remaining cheese on top, then add Panko bread crumbs.
- Bake at 350° for 30 minutes, then place on broil for 2-5 minutes until Panko is browned and crunchy. Watch it carefully … the Panko crumbs can burn quickly!
Notes:
If you don’t have half & half on hand, you can use all whole milk, but it will not be as creamy, and may take longer to thicken up when cooking the sauce. You can also adjust this to taste by using more or less of either product, depending on how rich you want it to be.
If you want to make this ahead of time, complete all steps except for baking. Once you have it in your baking dish, wrap it tightly with plastic wrap or foil (or use a lid if you have one for your dish). It will keep in the fridge for a couple of days. You can also freeze it, as long as it is wrapped well so that it will not get freezer burnt. When you are ready to bake, take it out of the fridge 30-45 minutes ahead of time to allow your dish warm up a bit, then bake according to directions above. If frozen, I would take it out of the freezer the night before, and let it thaw in the fridge overnight.
Choose Your Cheese: For mac & cheese, you really can choose which cheese types you prefer – basically any flavorful, semi-sharp hard cheese will work. Just make sure you have 6 cups of cheese grated and ready to go.
(Photo by Megan (Markham) Bucknall on Unsplash)


